


That's Why They Call it a CaseMod!
 |
So
out comes the dremel mini. I bought one at a local hardware store
for like $20. I put the bottom half of the nes case in the c-clamp
in my work bench, and put on my goggles. That's really important.
YOU
NEED TO WEAR
PROTECTIVE EYEWEAR! So much plastic was shooting up in my face. I would be blind with out them. |
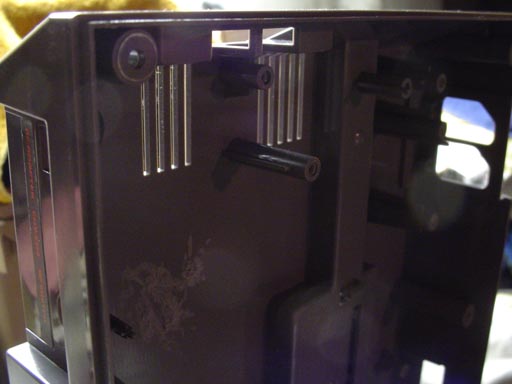
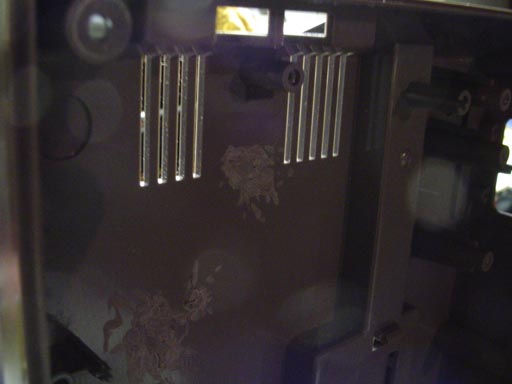
Here's
the case ready to be cut. The entire process of removing all the
risers took me about a week. I worked on it for like an hour or
two every day. Since my dremel is battery powered I had to keep
quitting. Here i'm going to take you threw the process of cutting just one riser. Our subject is the larger of the two pegs on the left by the vents. |
 |
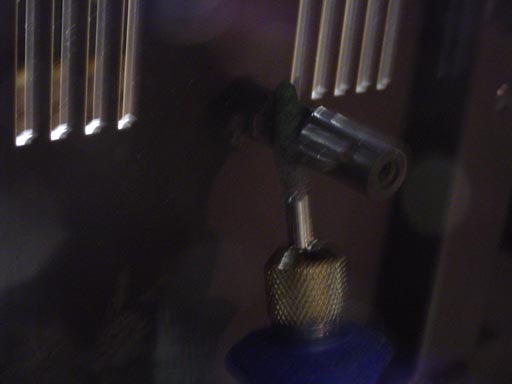 |
I
started by using the dremel cutting tool. I worked it back and forth
like a saw. This process can be slightly difficult at times because
of the angle you are cutting at. You have to keep pulling the bit
back out the plastic or it will melt right on the bit. You also
need to be careful, can't press too hard or you will damage your
dremel. |
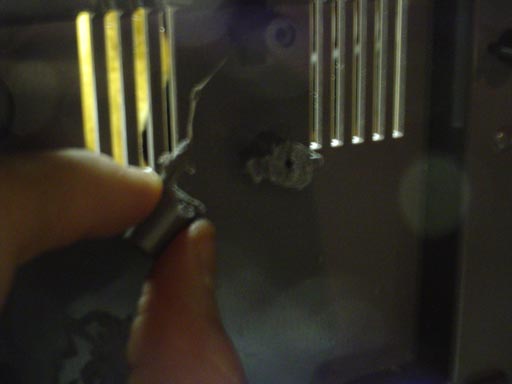
Eventually
you will cut threw the riser. The piece can be pretty hot right
after cutting it, so watch out. You have no use for these excess
pieces, discard them. Don't worry about the angle you cut at, or
if you scratch the case. Since all the rises are inside no one will
see the way you cut them. |
 |
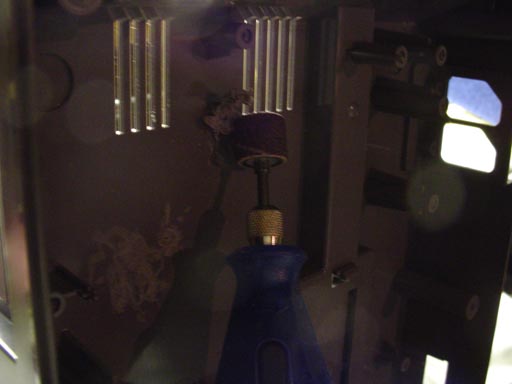 |
The
final step is pretty important. The sander is the easiest to bit
to use, in my opinion. And it's so fast! Just start rubbing the
sander on the little 'nub left behind by the cutting tool. Eventually
a wad of plastic will amass, just use the top edge of the dremel
to nick it off the bottom of the case. |
|
And
here is the case after cutting out the riser. You can see the discoloration
of where the peg was. But because I used the sander dremel bit
the bottom of the case is still smooth. I cut out every peg in
the case, excluding the ones in the four corners, the two below
the power switch, and the one in the front center that holds the
lid together under the game door.
|
 |
Next >>