
This is a tutorial. I am NOT responsible for anything that happens to your
computer as a result of this procedure. DO THIS AT YOUR OWN RISK!
Modifying the XP Boot Logo
The
first tool you will need is Resource
Hacker. First locate your ntoskrnl.exe, which can be found in
\windows\system32. Make a copy of your ntoskrnl.exe and rename ntoskrnl.bak.
Now up Resource Hacker and open the ntoskrnl.exe. Microsoft decided
to remove the pallet from the logo to another location. So now when
you open up ntoskrnl.exe in Resource Hacker, the .bmps are just
black images. 
In the left hand column you will see a list of resources to edit.
Open the first tree called Bitmaps and you will see numbers 1-10.
Numbers 1, 8, and 10 are the WinXP Pro bitmaps. 1, 7, and 9 are
for Home Edition. 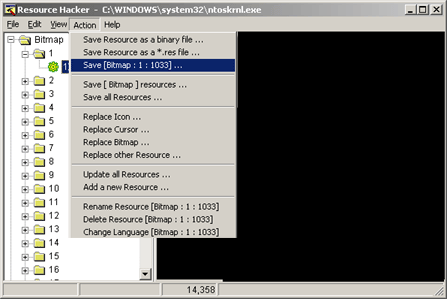
Then go to the action menu and click 'save Bitmap'. Save the bitmaps
wherever you would like to, just remember where they are for later
use. Now for editing these images. Open all three of these images
into Paintshop or Photoshop. When they open, they will be completely
black. In order to see the real images, we have to import the pallet.
In Paintshop, hit Shift + O and select the 16.pal
file. In Photoshop click the Image menu, then Mode, then Color Table.
Load 16.act
file.
(right click + save target as) Edit the images then Re-Instert them with ResRack. |
Modifying the XP Logon
|
It
took me a while to figure out how to do this. There are two applications
you can use. The first one I found on my friend's house. It's
called ChameleonXP.
It worked great for him but I couldn't get it to run on my computer.
I used an application called LogonStudio.
You can download pre-made logons here.
The program is really easy to use. 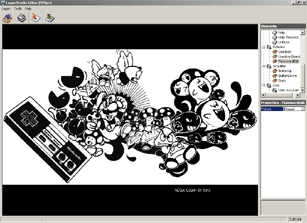
It give you a sample logon, you click what you want to edit, them
use the file browser to select the new image you want to use.
Then just save the file and there you go. You also can use ResHack
on logond but if the images arn't exactly the same size it will
not work.
|
Linx >>

